There has always been a huge benefit to capturing your own content from home or the office, but these days having your own studio space can make all the difference in how your business is perceived by clients. At Jelly Marketing we have built our studio space up over time and I wanted to share some of the best tips, tricks and gadgets that have helped us out along the way.
If you are looking to improve your visuals for Zoom calls, Webinars or promotional videos there is a few things you can do:
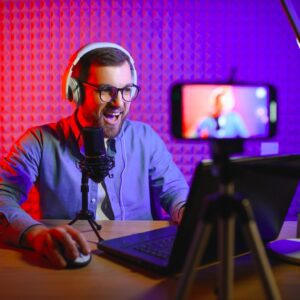
- Be conscious of your light colour
The colour of light can vary a ton depending on the source and regardless of what you are using to light yourself in your studio space. The most important thing is to try and limit the colours of light that are falling on you. If you have a regular lightbulb above you and window light coming in from the side, either turn off the light or close the blinds. Having both will cause you to look too blue or your background to look too orange depending on how the camera sees the scene, or how your white balance is set. One handy way to get around this issue is by replacing the bulb in your lamp with a multicolour LED. These will allow you to change colour temperature when they are turned off and on again. - Take control and bring in your own light
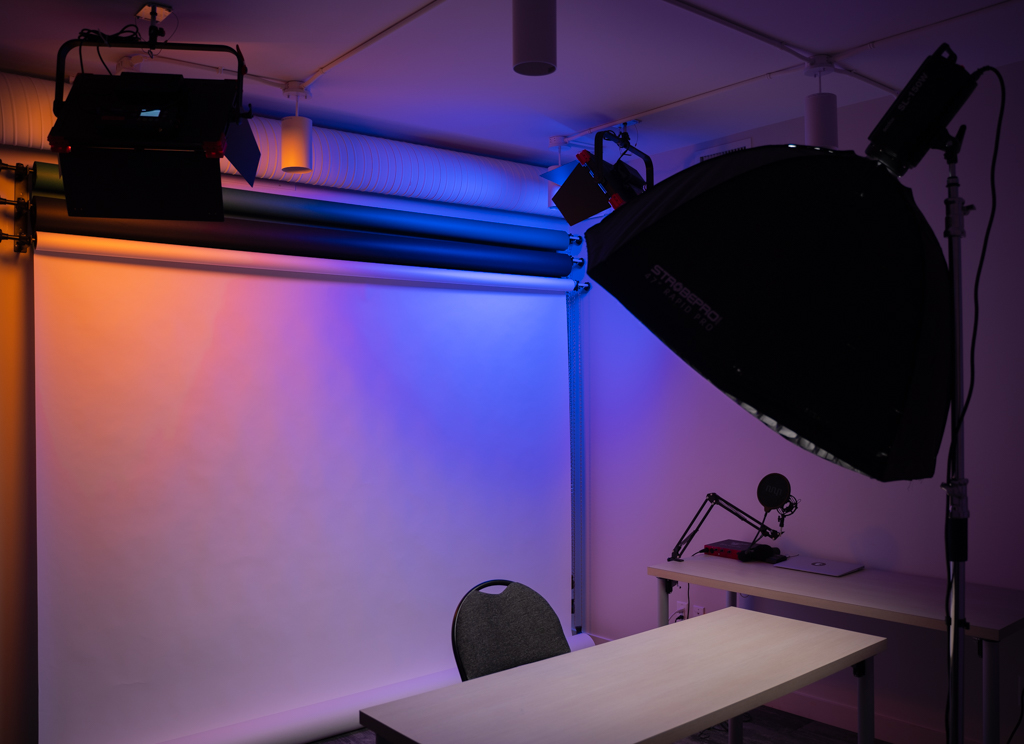
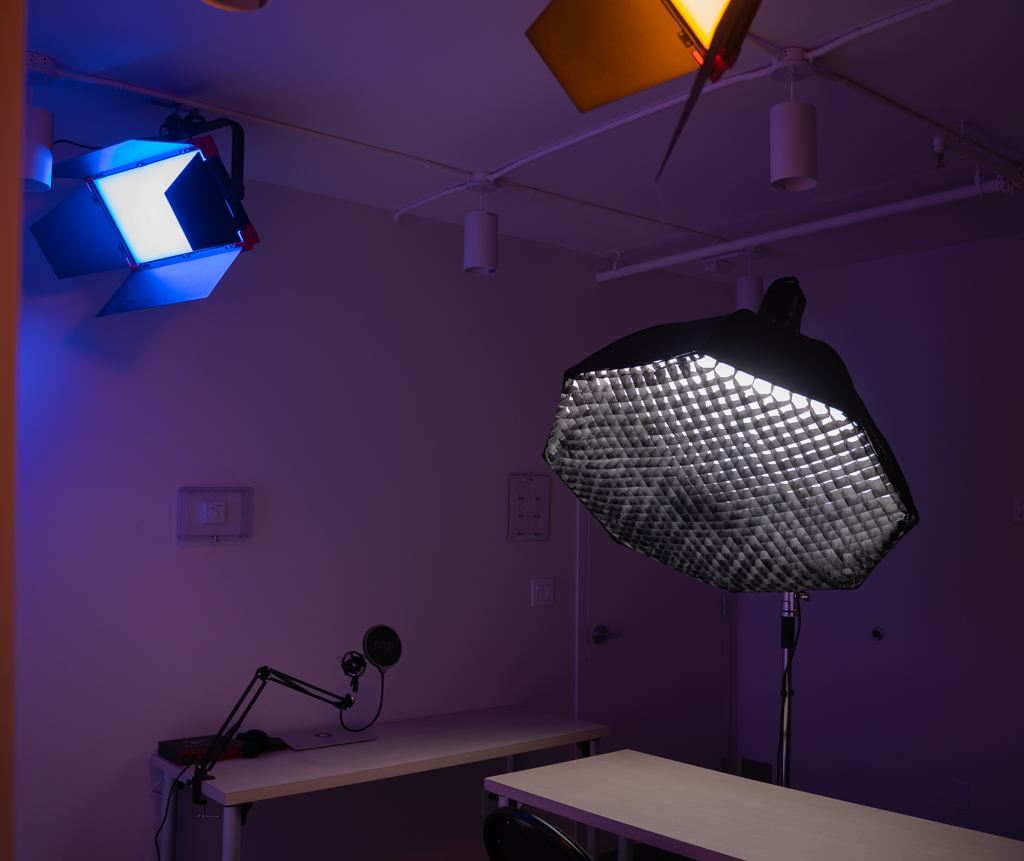
There are a bunch of great options out there for lighting up your studio space. These can vary from the inexpensive Ring Light to a much larger studio light and soft-box. What is important here is the size of your light source. The larger the light source the softer the light will be, resulting in less intense shadows and an overall more pleasing look. At Jelly we use a Godox SL-150 with a 47” Godox Octabox as our main studio light.
We also use a pop up reflector to bounce light back up to the subject. This helps further reduce shadows under the chin and provides a catch light in the eye.
- Stepping up your Camera game
Built in webcams can certainly work in a pinch, but if you are looking to improve your visual quality we recommend using a digital SLR as your webcam. This is a pretty huge jump in investment, but can be used for far more than just your in studio videography. To be able to utilize your SLR as a webcam you’ll want an HDMI to USB capture card (some cameras now have software that will make this unnecessary). We had tried out a few options, but have been super impressed with the Elgato Cam Link. It doesn’t require any additional software to use,so you can just plug it in and select your SLR as your webcam. - Improving your audio
Audio is what will make or break your video. The problem is if your audio is great, most people won’t notice. But if your audio is bad, you are definitely going to hear about it (pun intended..sorry). Using your computer to record a USB mic can be a great solution. If you are going the SLR route you can also use a lav mic or a directional mic. - Background
The options for backdrop will often be determined by your space. Sometimes it’s nice to have an office space or work environment behind you. This can be a great way to incorporate a bit of a story into your backdrop. At Jelly we have a few choices of paper seamless backdrop that are hung with a wall mount. If you are more limited in space and want something simple and clean you can also acquire smaller pop up backdrops. The only trouble with these is that you will often have to sit quite close to them causing a shadow to fall on the background and not allowing for much depth in your shot. - Lighting Your Backdrop
If you’ve gone the backdrop route there are a few ways you can light it up. A single light placed behind your seating position and pointed at the backdrop can provide a spot light effect that is quite popular. If you have the light shining straight up it may also be able to provide a bit of a rim light while still lighting your backdrop depending on your setup. We are currently using two RGB Light Panels suspended from the ceiling. We love this option because it allows us to evenly light the backdrop. We can also use it as a rim light if needed and they give us the option to use any colour(s) we want,which works well for our Jelly brand. To ensure that the colours on our backdrop don’t get washed out by our main light,we use a grid on our octabox to control the spread of light across the scene.
Check out how our Video Podcast setup has changed over the years.If you have any questions about setting up or customizing your studio space please feel free to reach out!
Travis Jeffers
Multimedia Specialist
Jelly Marketing